How to Restore a Roof Step-by-Step
Restoring your roof can breathe new life into your home, ensuring safety, enhancing aesthetics, and extending its lifespan. In this guide, we’ll explore a comprehensive, step-by-step process for roof restoration, helping Brisbane homeowners protect their investment and maintain a healthy living environment. Ready to rid your roof of asbestos safely and quickly? Let’s dive in!
When to Restore vs. Replace Your Roof
Determining whether to restore or replace your roof depends on several factors, including the extent of the damage, the age of the roof, and your budget. Making the right decision can save you time, money, and ensure long-term protection for your home.

Key Considerations:
- Age of the Roof: If your roof is over 15 years old, restoration might not suffice, and replacement could be necessary. Older roofs often have extensive wear and tear, and their materials may no longer be viable for effective restoration.
- Extent of Damage: For minor issues like broken tiles or ridge capping repairs, restoration is ideal. However, widespread damage, such as extensive leaks or structural weaknesses, might require a complete replacement to ensure the integrity of your home.
- Budget Constraints: Roof restoration is generally more cost-effective than replacement, making it a suitable option for homeowners looking to save money while still maintaining their roof’s functionality and appearance.
Detailed Decision Process:
- Assessment: Conduct a thorough assessment of your roof’s condition. Look for signs of aging, such as sagging areas, widespread moss or algae growth, and significant discoloration.
- Consultation: Seek professional advice to understand the specific needs of your roof. Experts can provide insights into whether restoration or replacement is more suitable based on their experience and the latest industry standards.
- Cost Analysis: Compare the costs of restoration versus replacement. Consider not only the immediate expenses but also the long-term benefits and potential savings from increased energy efficiency and reduced maintenance needs.
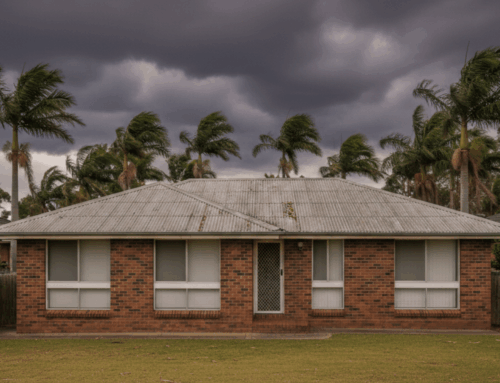
Signs Your Roof Needs Restoration
Knowing the signs of a deteriorating roof can help you act promptly and avoid more extensive (and expensive) repairs. Early detection of issues can significantly extend the life of your roof and prevent more severe damage to your property.

Common Indicators:
- Leaks and Water Damage: Persistent leaks or water stains on your ceiling suggest your roof needs attention. Leaks can lead to structural damage, mold growth, and compromised insulation if not addressed promptly.
- Broken or Missing Tiles: Broken tiles or gaps in metal roofing indicate wear and tear that needs fixing. Missing tiles can expose the underlayment and roof deck to the elements, causing further deterioration.
- Mold and Algae Growth: Visible mold or algae on your roof surface is a sign of moisture retention, which can weaken your roof structure. These growths can also create a slippery surface, increasing the risk of accidents during maintenance.
- Fading and Discoloration: Loss of color or uneven patches on your roof tiles or metal sheets are aesthetic issues and signs of material degradation. Discoloration often indicates that the protective coatings on your roof have worn off, leaving the materials vulnerable to the elements.
Detailed Examination:
- Interior Inspection: Check your attic or top floor for signs of light coming through the roof boards, dark spots, or trails that signal water damage. These can indicate areas where the roof’s integrity has been compromised.
- Exterior Inspection: Walk around your property and use binoculars to get a close-up view of your roof. Look for curled, cracked, or missing shingles, rust spots on metal roofs, and damaged flashing around chimneys, vents, and other roof penetrations.
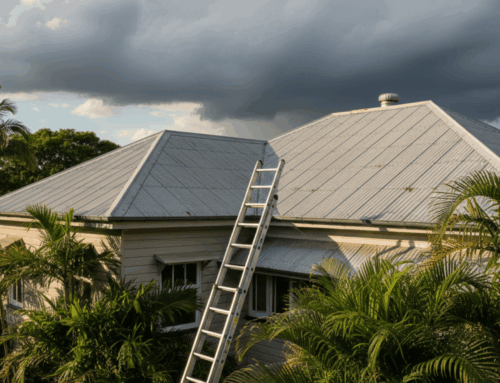
Preparing Your Roof for Restoration
Proper preparation is crucial to ensure the success of your roof restoration process. Preparing your roof involves cleaning, repairing, and setting up the necessary safety measures to create an ideal working environment.

Steps for Preparation:
- Initial Roof Inspection: Conduct a thorough roof inspection to identify all problem areas, including roof tiles, ridge capping, and any existing roof membrane. Document the findings and plan the restoration process accordingly.
- Safety Measures: Set up scaffolding and ensure the area is safe for the restoration crew. This includes using harnesses, safety nets, and other protective equipment to prevent accidents and injuries.
- Clearing Debris: Remove any debris, leaves, or dirt from the roof area to provide a clean surface for restoration. This step is essential for effective cleaning and repair and ensures that the restoration materials adhere properly.
Detailed Preparation Guide:
- Tools and Equipment: Gather all necessary tools and equipment, such as ladders, scaffolding, safety harnesses, power washers, and repair materials. Ensure that all tools are in good working condition and that you have enough supplies to complete the job.
- Weather Considerations: Check the weather forecast and plan the restoration for a period of dry, calm weather. Avoid working on the roof during rainy, windy, or extremely hot conditions to ensure safety and effectiveness.
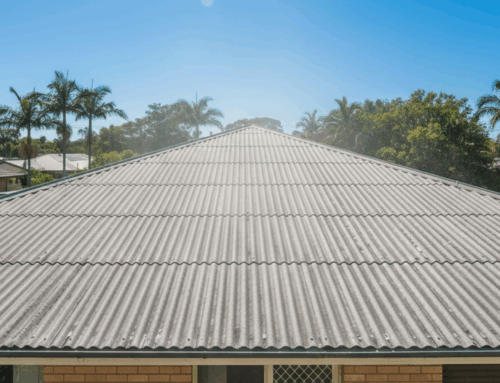
Cleaning and Preparing the Roof Surface
Cleaning your roof is essential to remove contaminants that could interfere with the restoration process. A clean surface ensures that new materials adhere properly and that any underlying issues are visible and can be addressed.

Cleaning Techniques:
- High-Pressure Cleaning: Use high-pressure water jets to clean the roof surface, removing dirt, moss, and algae. High-pressure cleaning is effective for both tiled and metal roofs and can reveal hidden damage that needs repair.
- Chemical Treatments: Apply anti-fungal treatments to prevent future growth of mold and algae. These treatments penetrate the roofing materials and kill spores, preventing regrowth and maintaining the appearance of your roof.
Detailed Cleaning Guide:
- Surface Preparation: Before cleaning, cover any nearby plants and landscaping to protect them from debris and chemicals. Ensure gutters are clear to prevent blockages and water damage during cleaning.
- Cleaning Procedure: Start at the top of the roof and work your way down, using consistent pressure to avoid damaging the roofing materials. Pay special attention to shaded areas where mold and algae are more likely to thrive.
Repairing Roof Damage
Addressing any structural damage is crucial before proceeding with the restoration. Proper repairs ensure that your roof is sound and that the restoration materials will provide long-lasting protection.

Repair Methods:
- Replacing Broken Tiles: Remove and replace broken or cracked tiles to ensure your roof is intact. Use matching tiles to maintain the roof’s appearance and ensure that replacements are properly aligned and secured.
- Fixing Ridge Capping: Repair or replace damaged ridge capping to prevent leaks and improve structural integrity. Properly installed ridge capping provides a secure seal along the roof’s peak, preventing water ingress and wind damage.
- Sealing Leaks: Use appropriate sealants to fix any minor leaks detected during the inspection. Sealants should be compatible with your roofing materials and applied according to the manufacturer’s instructions for maximum effectiveness.
Detailed Repair Guide:
- Tile Replacement: Carefully lift the surrounding tiles to access the broken one. Remove the damaged tile and install the new one, ensuring it sits flush with the existing tiles. Secure it with roofing nails or clips as needed.
- Ridge Capping Repair: Remove any old mortar or adhesive from the ridge capping area. Apply new mortar or adhesive and set the ridge capping in place, ensuring it is aligned correctly and securely fastened.
Applying Roof Coating or Membrane
A roof coating or membrane adds an extra layer of protection to your roof, enhancing its durability and resistance to weather elements. Proper application is key to ensuring long-term performance and protection.

Application Process:
- Primer Application: Apply a primer to ensure better adhesion of the top coats. Primers create a smooth, stable base that enhances the performance of the roof coating or membrane.
- Roof Coating: Use high-quality roof coatings suitable for your roof type (tiles or metal) to provide a protective layer. Roof coatings can improve waterproofing, reflectivity, and resistance to UV rays, extending the life of your roof.
- Membrane Installation: For added waterproofing, install a roof membrane over the coating, particularly in areas prone to heavy rainfall. Roof membranes provide an additional barrier against water infiltration and can enhance the roof’s overall durability.
Detailed Application Guide:
- Choosing Materials: Select a roof coating and membrane that are compatible with your roofing materials and climate conditions. Consider factors such as UV resistance, flexibility, and warranty when making your choice.
- Application Technique: Follow the manufacturer’s instructions for mixing and applying the primer, coating, and membrane. Use consistent, even strokes to ensure a uniform application and avoid pooling or streaking.
Sealing and Protecting Your Roof
After the coating or membrane application, additional sealing ensures long-term protection. Sealing all edges and joints prevents water ingress and enhances the roof’s durability.

Final Sealing Steps:
- Edge Sealing: Seal all edges and joints to prevent water ingress. Use high-quality sealants that are compatible with your roofing materials and designed for exterior use.
- Protective Finish: Apply a final protective finish to enhance the durability and appearance of your roof. Finishes can provide additional UV protection, improve reflectivity, and give your roof a polished look.
Detailed Sealing Guide:
- Sealant Selection: Choose a sealant that is durable, flexible, and weather-resistant. Ensure it can withstand the specific climate conditions in Brisbane, including intense sunlight and heavy rainfall.
- Application Method: Apply the sealant along all edges, joints, and areas where different roofing materials meet. Use a caulking gun for precise application and smooth the sealant with a tool to ensure a watertight seal.
Maintaining Your Restored Roof
Regular maintenance is key to extending the lifespan of your restored roof and ensuring it remains in top condition. A well-maintained roof can provide reliable protection and enhance the value of your home.

Maintenance Tips:
- Regular Inspections: Schedule periodic roof inspections to detect and address issues early. Regular inspections can identify potential problems before they become significant, saving you time and money on repairs.
- Cleaning: Keep your roof clean by removing debris and treating for mold and algae as needed. Regular cleaning prevents the buildup of materials that can cause damage and ensures that your roof remains aesthetically pleasing.
- Timely Repairs: Address any minor repairs promptly to prevent them from becoming major problems. Small issues, such as loose tiles or minor leaks, can be easily fixed before they cause extensive damage.
Detailed Maintenance Guide:
- Seasonal Checks: Perform inspections and maintenance tasks at least twice a year, ideally in the spring and fall. Check for damage after major storms or extreme weather events.
- Professional Services: Consider hiring a professional roofing contractor for annual maintenance. Professionals can provide thorough inspections, expert repairs, and ensure that your roof remains in optimal condition.
By following this comprehensive roof restoration process, you can ensure your roof remains a robust shield against the elements, enhancing the safety, value, and aesthetics of your home.
3-Step Roof Restoration Process
Step 1: Inspection and Preparation
- Thorough roof inspection
- Safety measures and debris clearing
Step 2: Cleaning and Repairing
- High-pressure cleaning and chemical treatments
- Repairing broken tiles and ridge capping
Step 3: Coating and Sealing
- Applying primer and roof coating
- Installing roof membrane and final sealing
Brisbane homeowners, are you ready to transform your home safely in just one day? With ICON Asbestos Roof Replacement, you can ensure your roof is safe, stylish, and built to last. Contact us today for a free quote and experience the peace of mind that comes with a restored roof!
Have questions or want to learn more? Leave a comment below or share this post to help others protect their homes!